ASUS VivoMini RAM Upgrade
16th April 2020My ASUS VivoMini VC66 PC although impressively specced in other areas, came from the factory with only 8 GB of RAM pre-installed. This machine runs Ubuntu Linux Server 18.04 and is my primary docker host for services such as PiHole DNS, Plex, etc. As i continue to spin up new containers and services, i will inevitably require more RAM - so lets install more!
What You Need:
- Asus VC66 PC
- RAM Kit (See below for buyers guide)
- Small flat head screwdriver
- Small phillips head screwdriver (Magnetic tip is extremely helpful)
RAM Buyers Guide
Samsung RAM
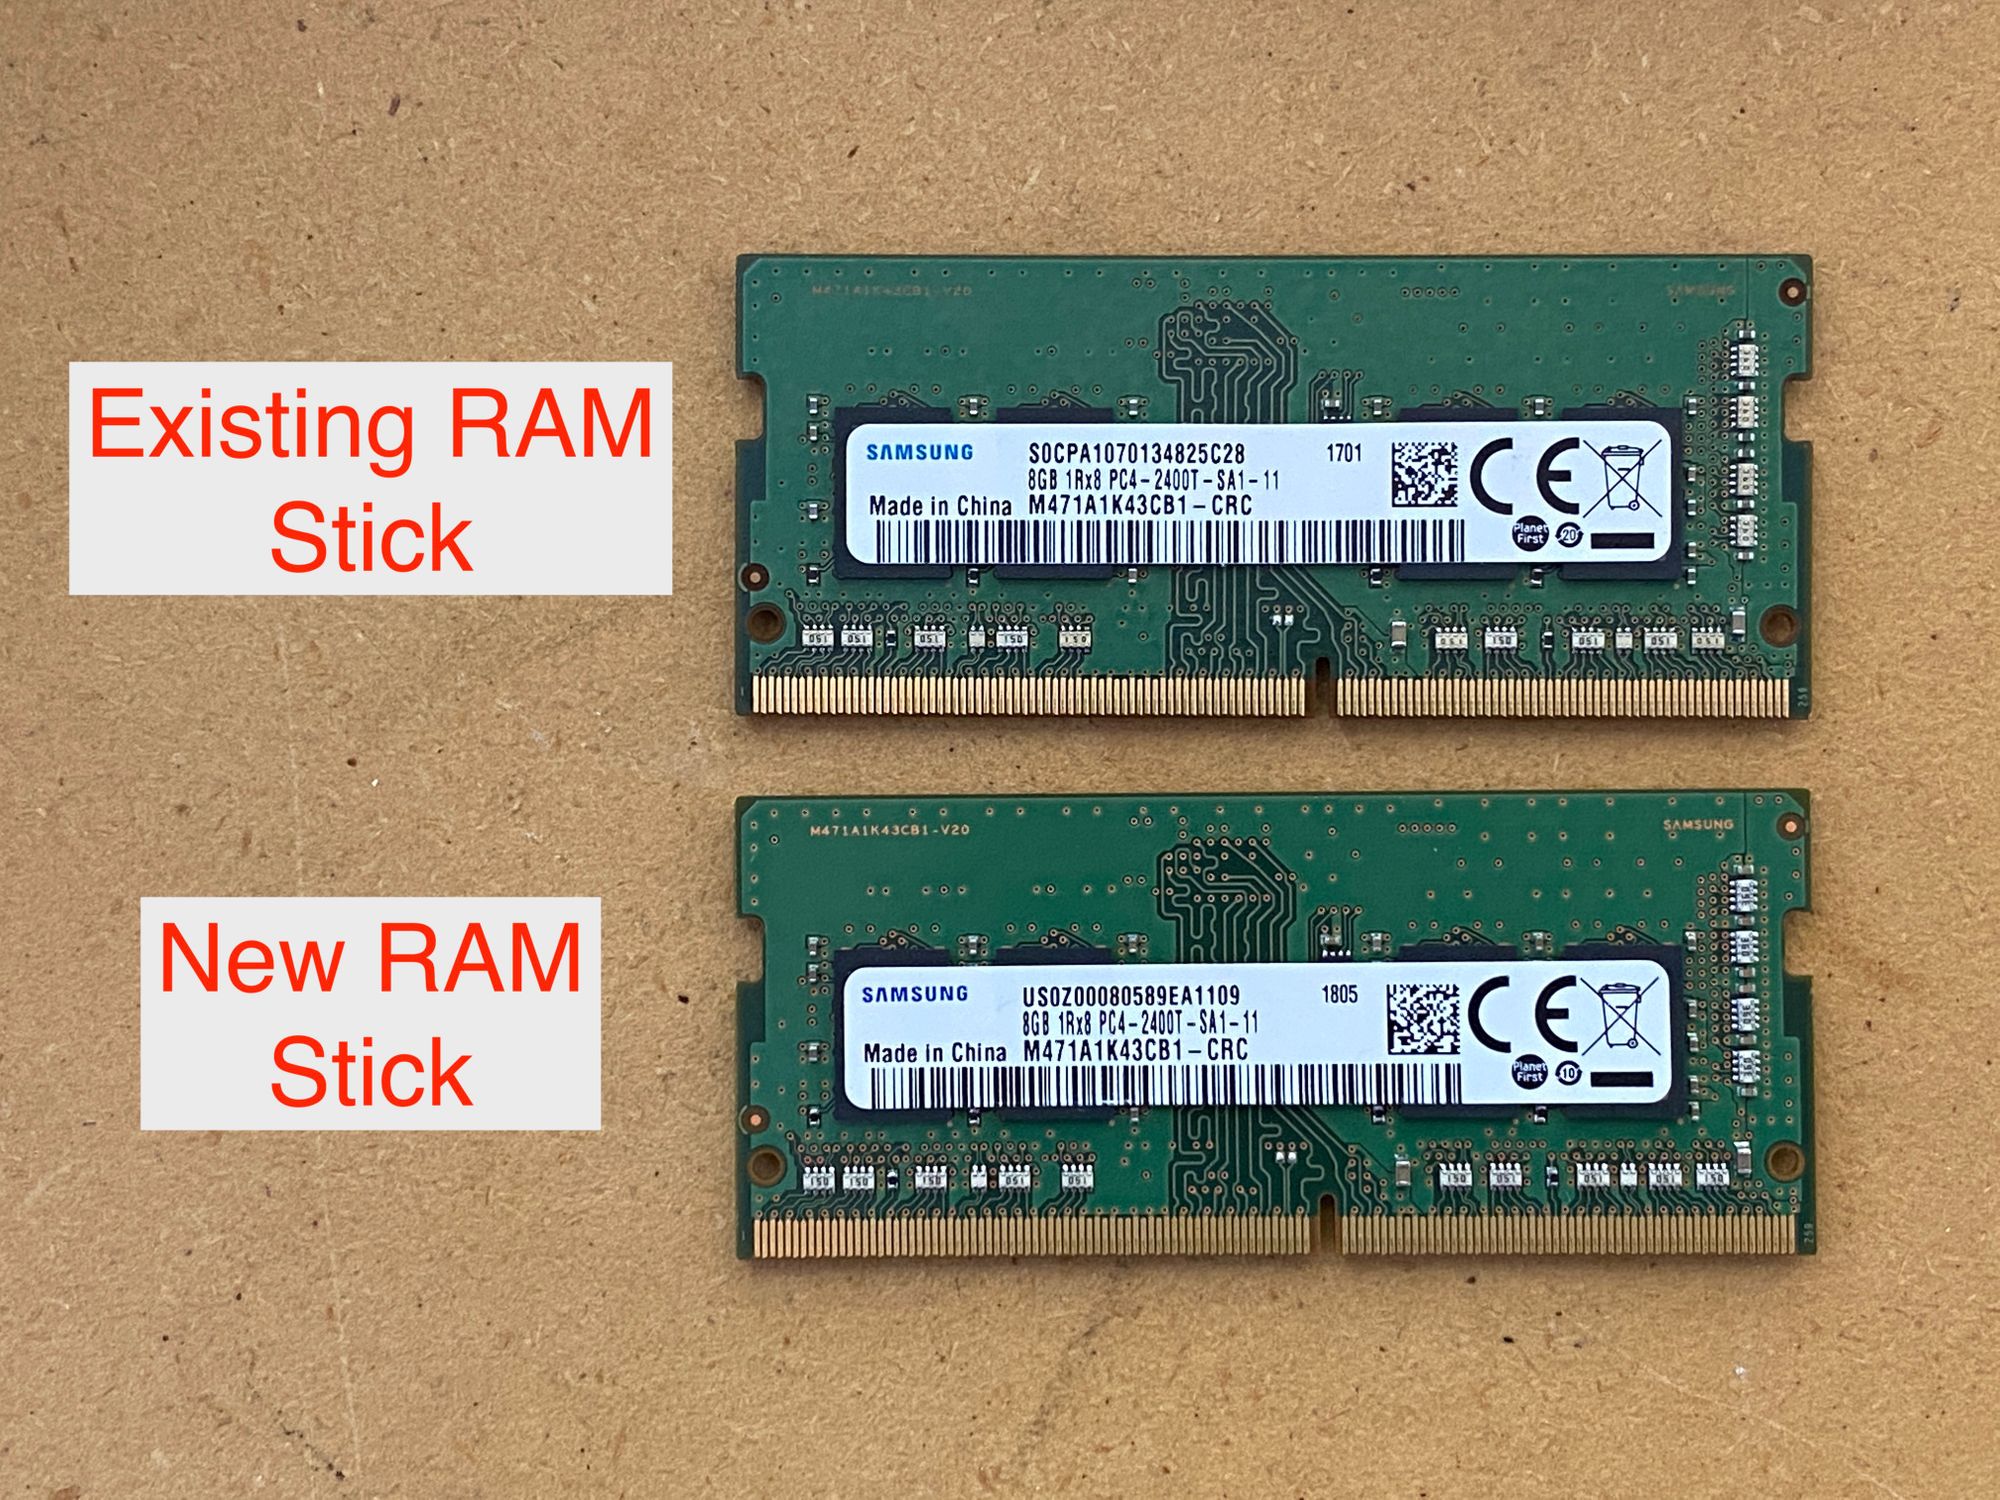
It is extremely important that you purchase compatible RAM for your system. In my systems case, it has DDR4-2400 RAM. If you are adding an additional stick of RAM (like i did) you must buy an exact matching stick to avoid any issues.
Crucial RAM Upgrade Kits
If you are looking to replace both sticks and upgrade to 32 GB, Crucial offers an upgrade kit.
Crucial 32 GB DDR4-2666 Upgrade Kit
Installation
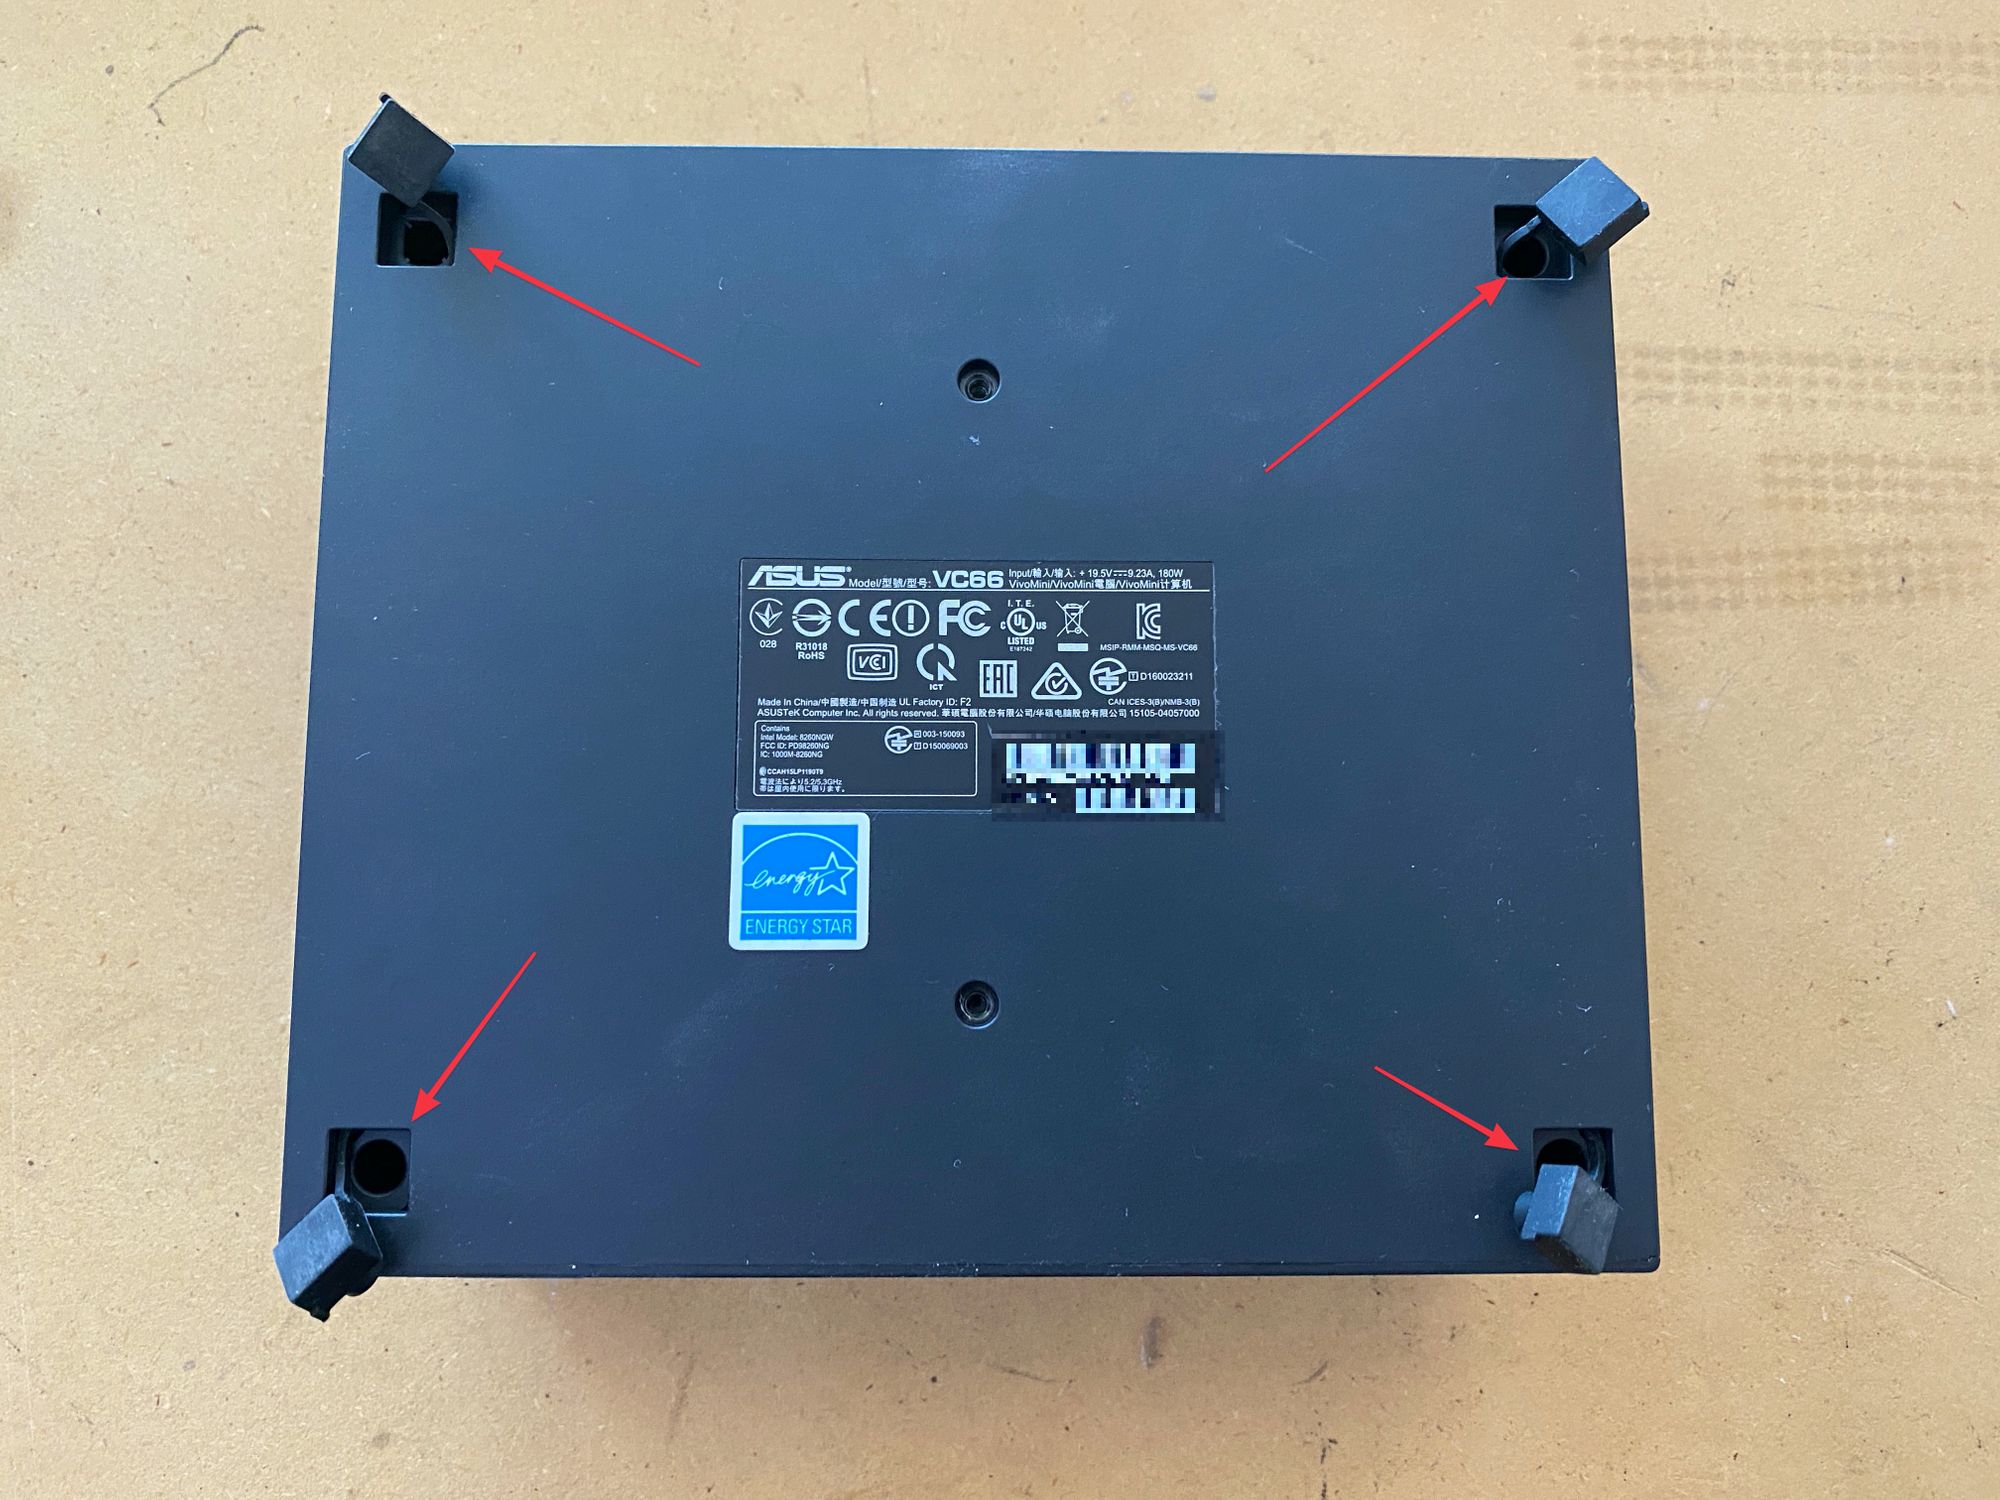
- Using the flat head screwdriver, pry up the small rubber feet to reveal the screws underneath. Using the phillips head screwdriver, unscrew all 4 screws holding in the bottom plate. If you are not using a magnetic screwdriver, you can flip the computer upside down to drop the screws out.
-
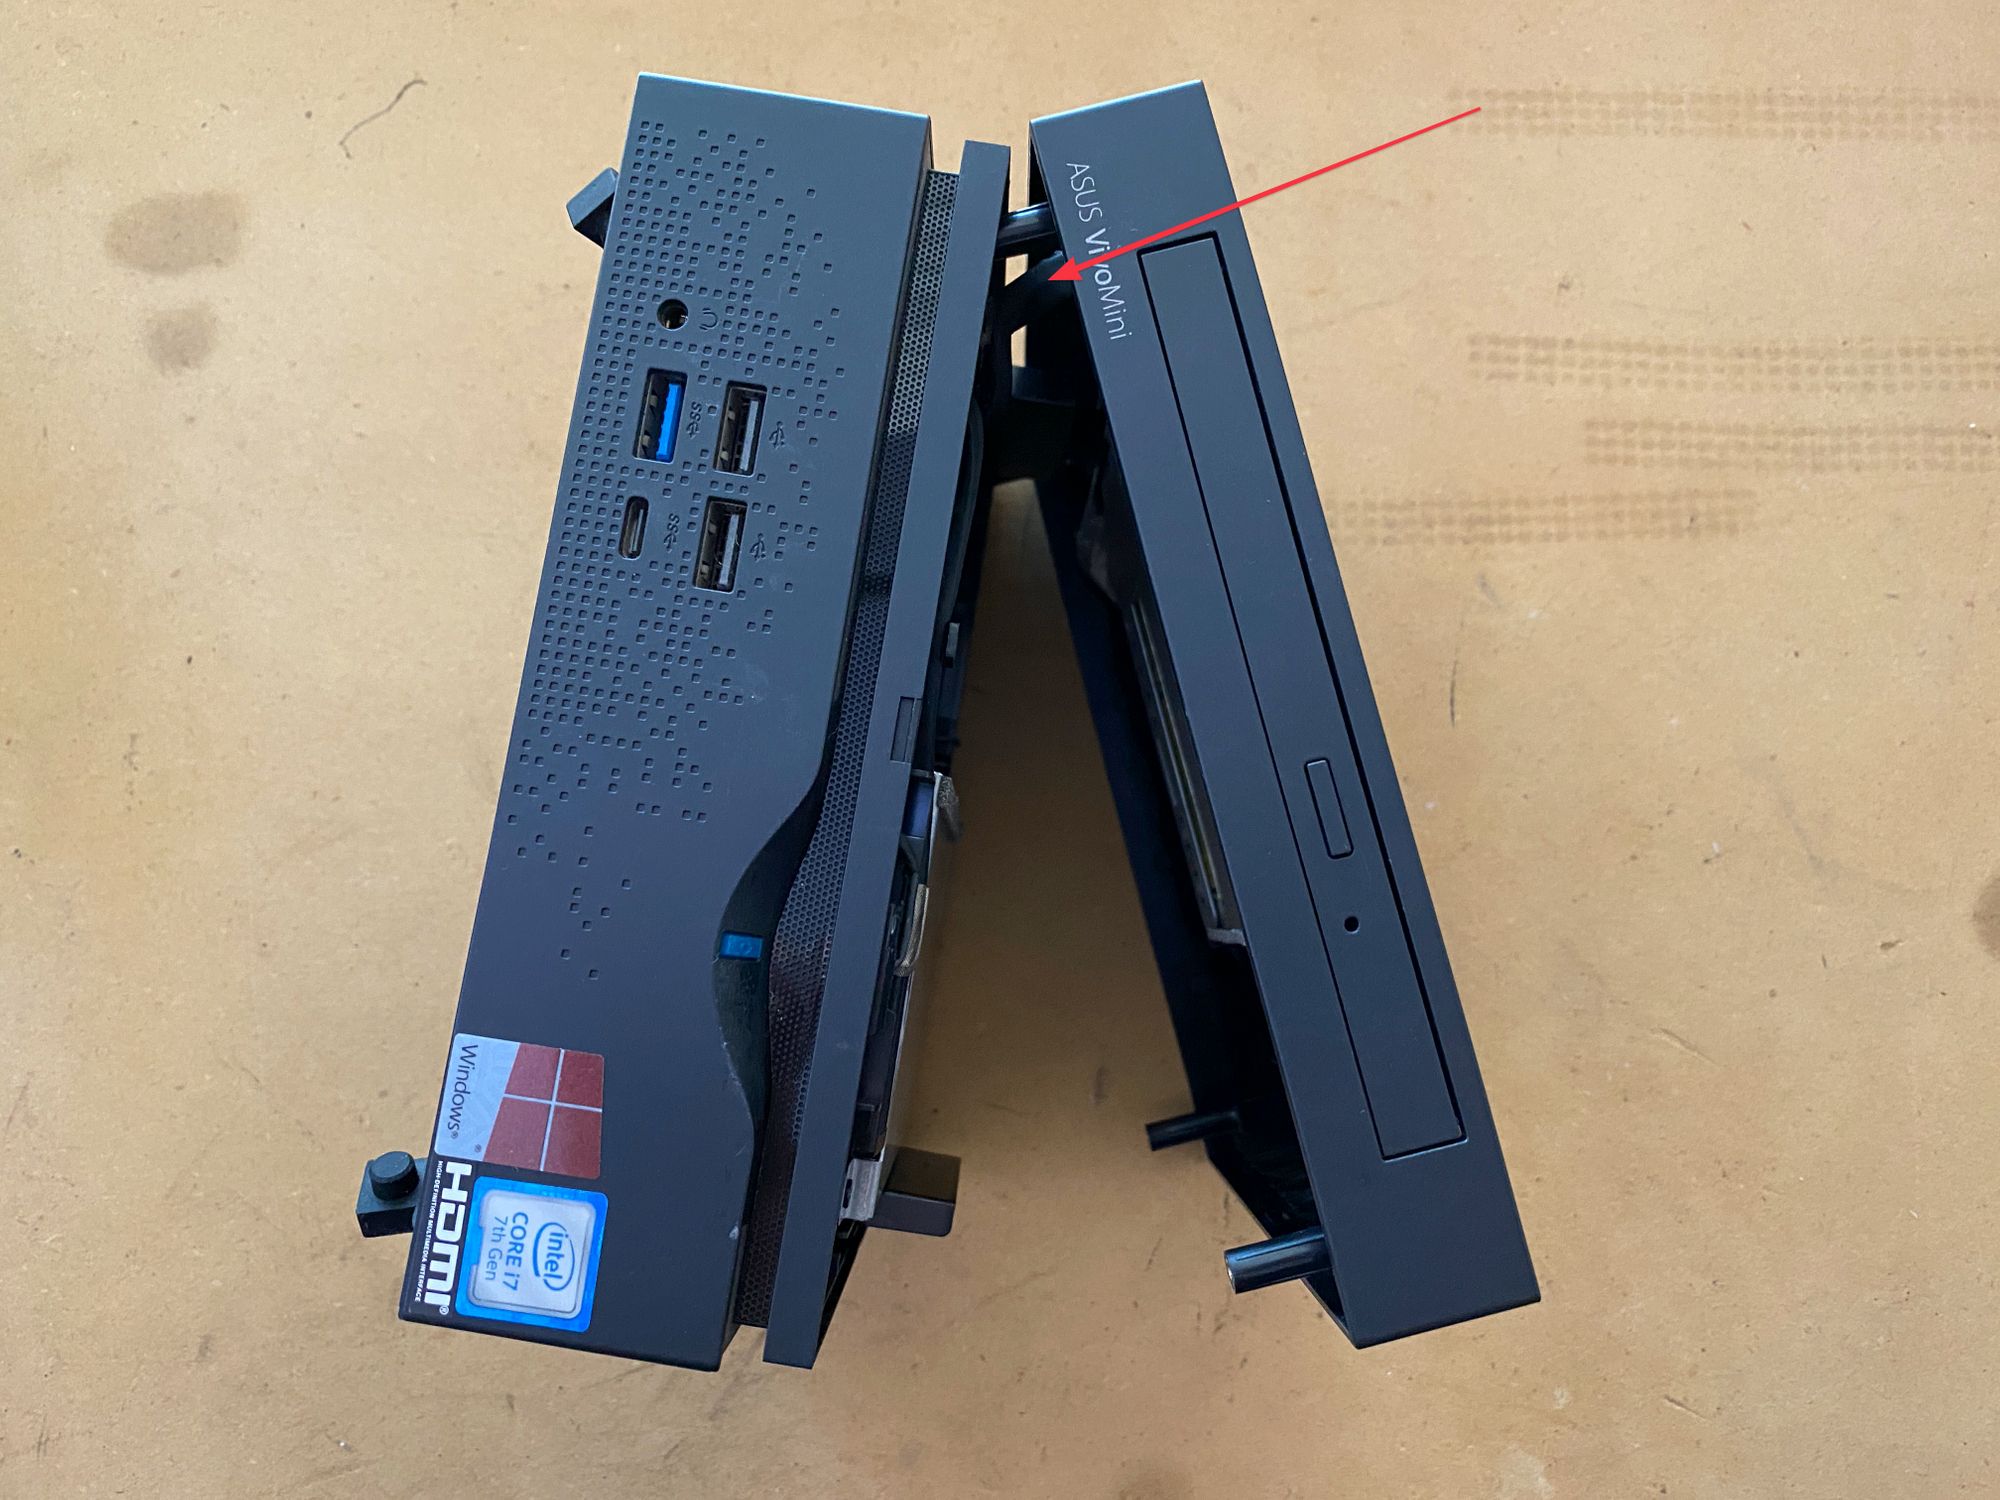
With the screws removed, turn the machine over on its side. Place your left hand on the bottom portion (With the USB ports) and your right hand on the top portion (with the disc driver). If all 4 screws are removed, the two halves should pop lose.
Be careful when separating the two halves, as there is a ribbon cable on the left side of the machine (indicated by red arrow).
- With the two halves separated, remove the 5th screw (indicated by red arrow).
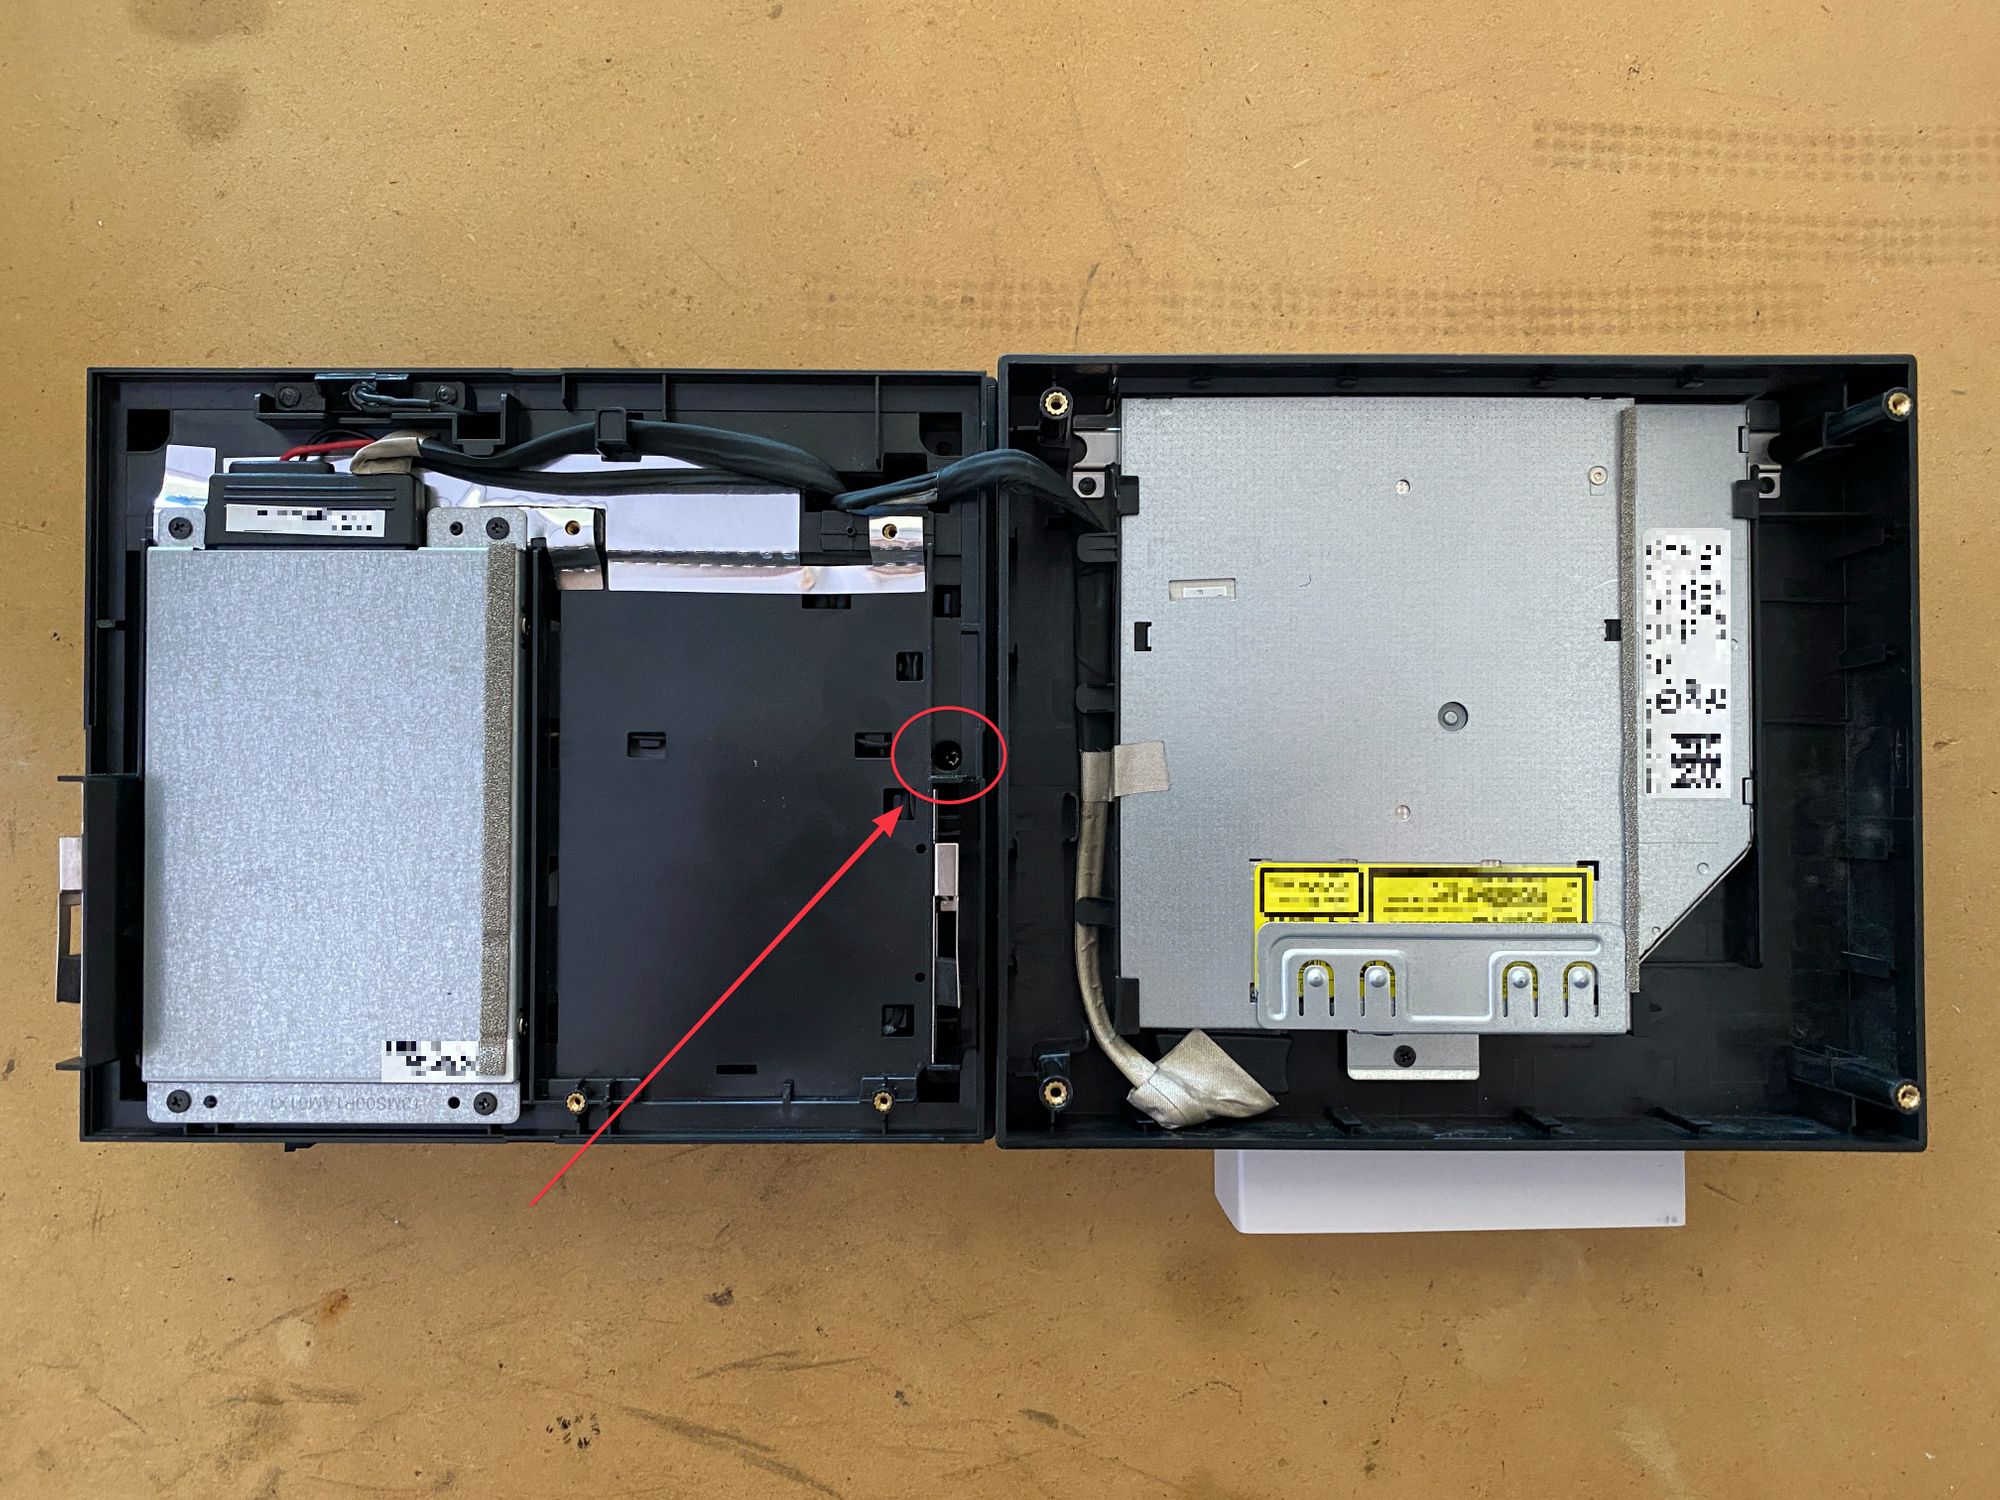
- With the screw removed, the hard drive tray cover can be popped out.
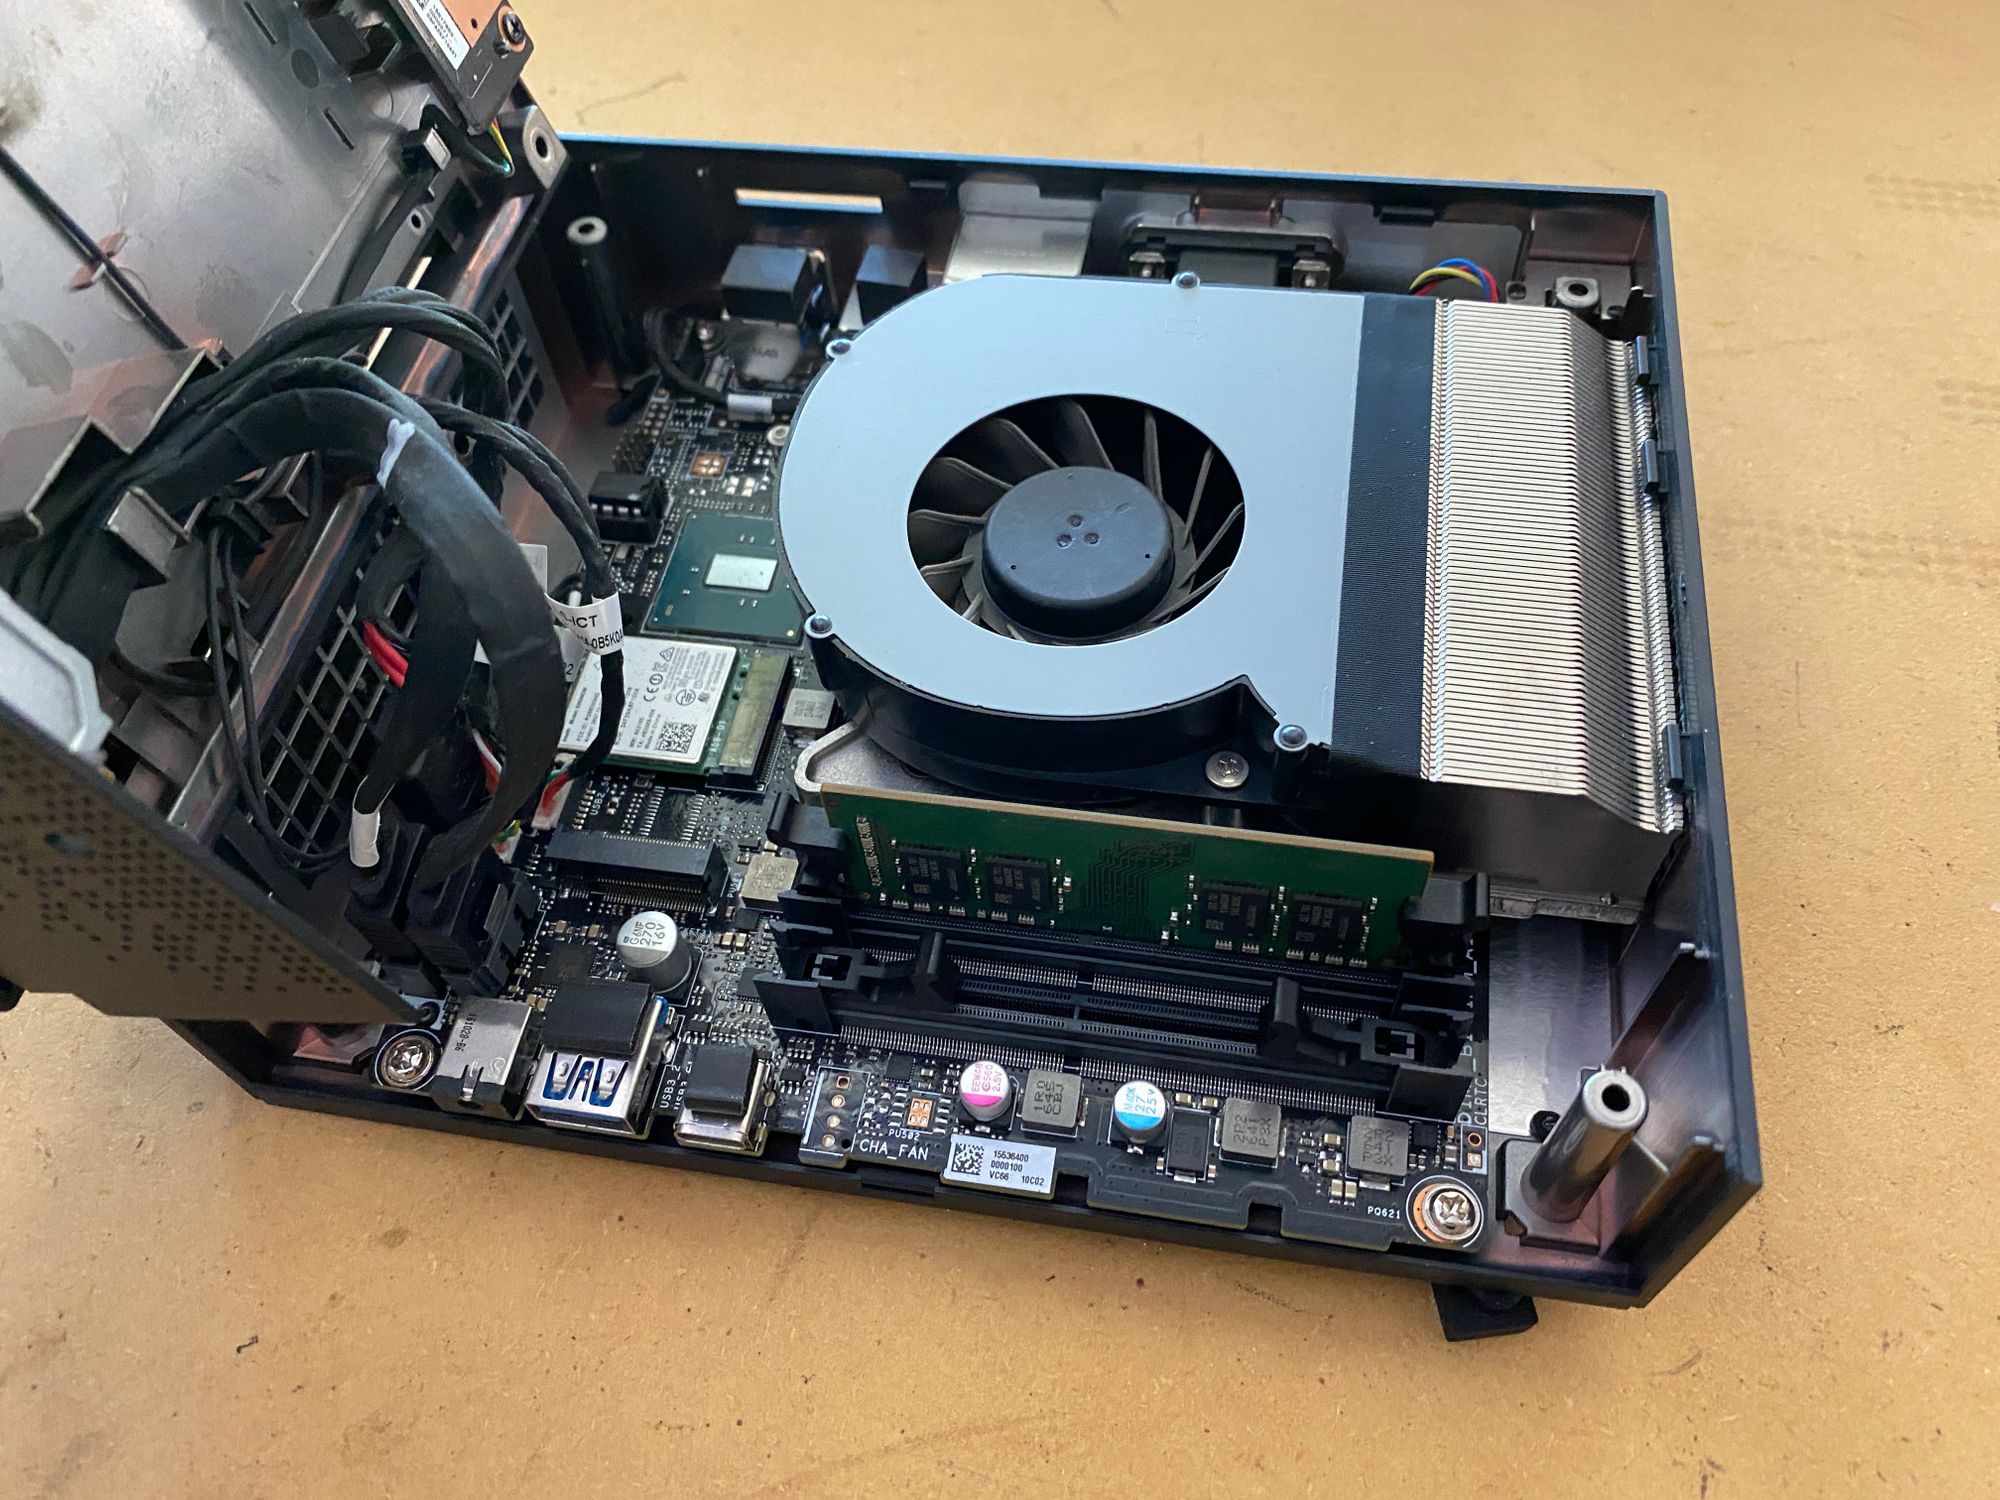
- Prepare your new RAM stick(s) for installation. As stated in the beginning of this article, i have chosen to add an additional OEM stick (for a total of 16 GB) instead of purchasing a 3rd party RAM replacement kit.
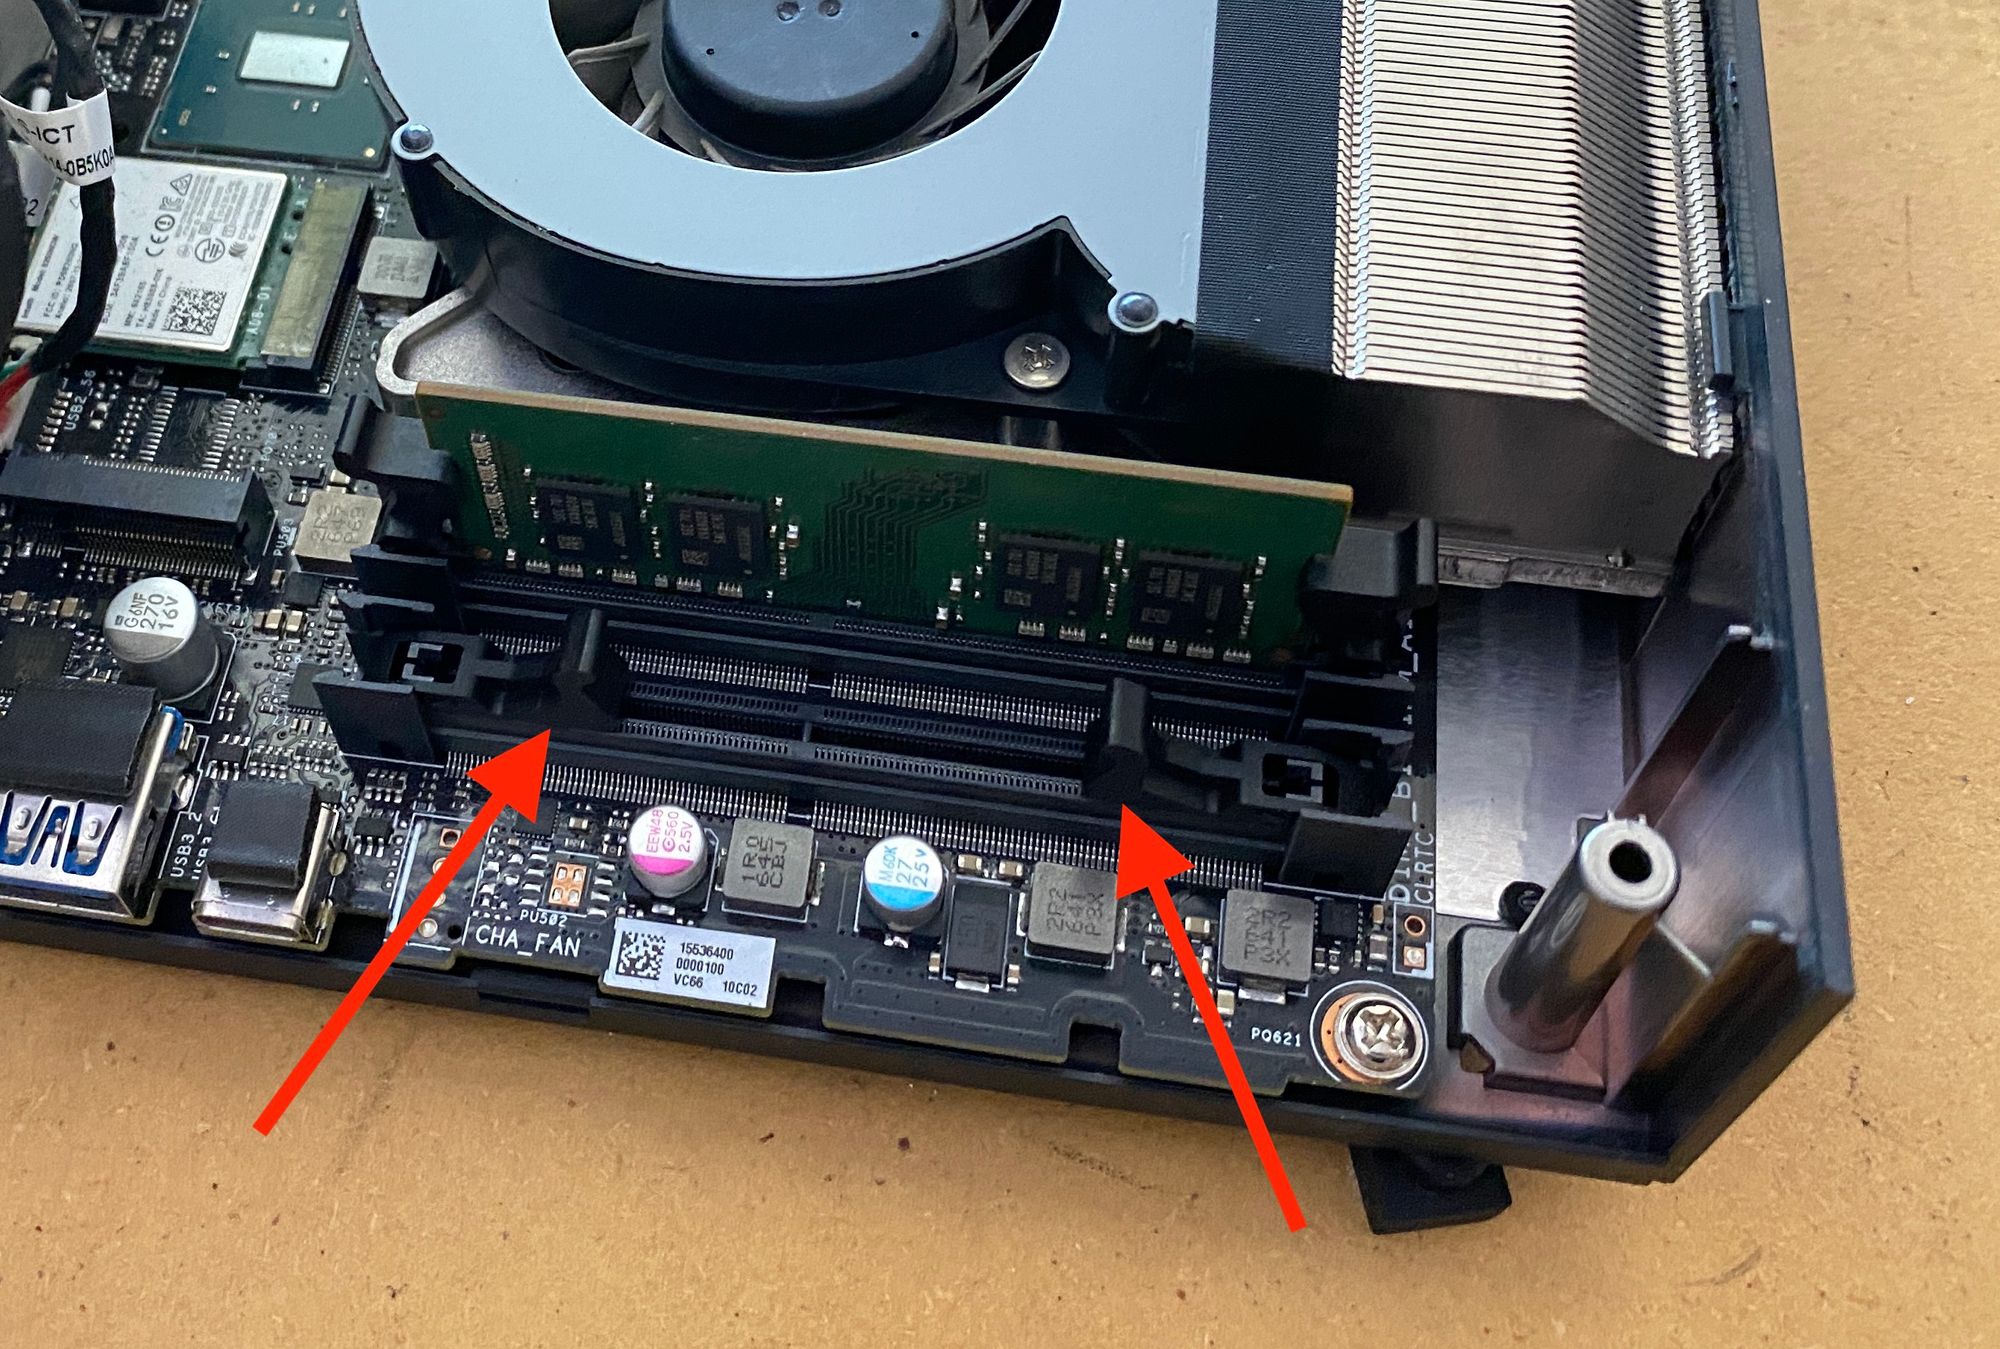
- Locate the second RAM channel and lift up the tabs. Insert the new stick and press down till the tabs lock into the sides of the RAM stick.

- Reverse the steps to reassemble your machine. At the end you should not have any leftover screws, so if you do - retrace your steps to make sure all screws are reinstalled.
-
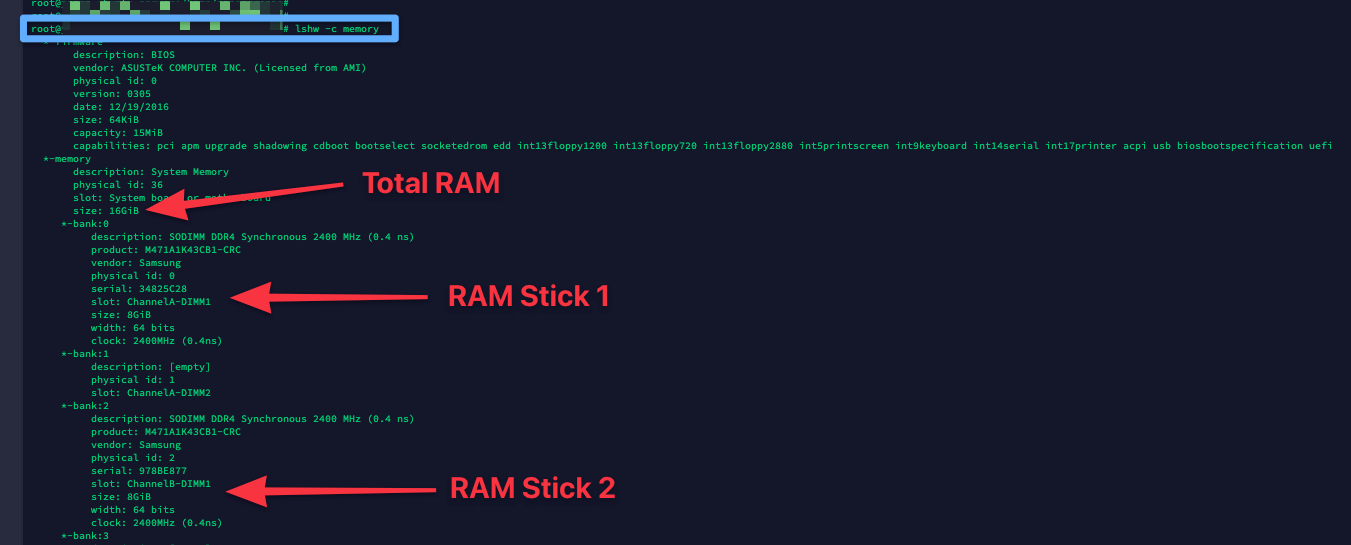
Once reassembled, i booted the machine and Linux was now able to see all 16 GB of RAM!
Terminal Command:
sudo lshw -c memory

View Comments